I found a wonderful group on facebook that has offered a 7 week stitch challenge as a distraction from the anxiety and/or boredom of the quarantine and to inspire creativity. The challenges have encouraged me to try new things and think outside the box. They were created by decorated embroidery veterans who provide videos and free printable worksheets to guide you along. I will share what I made in the coming weeks and maybe you could follow along, be inspired, or even join the group which has been a wonderfully supportive community. The group is called TextileArtist.org in case you are interested.
The first challenge was created by Sue Stone. The basic idea of this challenge is to create a sampler using one simple stitch a number of different ways . The limited stitch forces you to be more creative . Some examples are thickness of the stitch, spacing of the stitch, and direction of the stitch. This is a great opportunity to experiment without the pressure of ruining something you are working on.
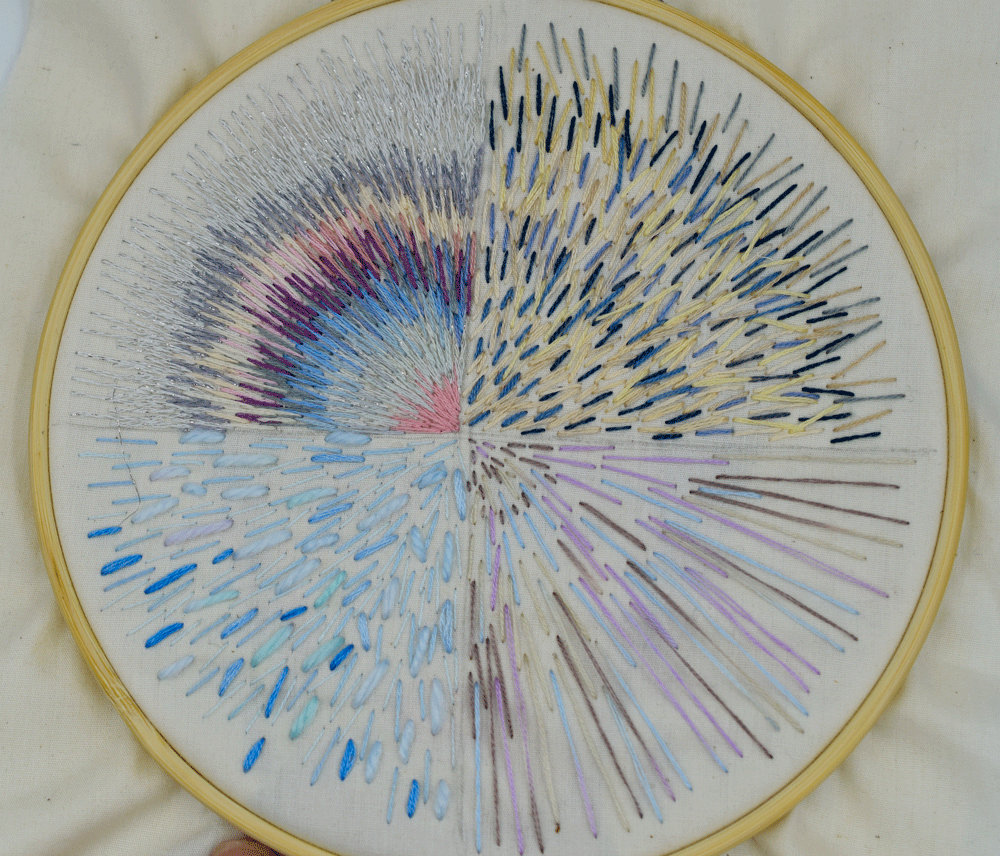
I divided my hoop into four separate quadrants by using a mechanical pencil to draw the two perpendicular lines. I used a simple straight stitch and leftover threads from my stash and filled each quadrant, experimenting as I went along.
In the first quadrant I made the stitches very close together. They almost look like a satin stitch. I enjoyed changing out the colors with each row.
Quadrant number two was inspired by the movie LOVING VINCENT, which I just watched. I decided to change the direction of the stitches which reminded me of Vincent’s brush strokes.
In the third quadrant I experimented with changing the length of the stitches, starting small and then radiating out to bigger stitches.
In the fourth and final quadrant I experimented with the thickness of stitches by using yarn as well as different numbers of strands of the six stranded threads.
I really enjoyed this challenge. It was fun to see all the special effects that one stitch alone could create! It gave me some really great ideas to apply to my embroidery projects!
Thanks for stopping by! Hope this gives you some great ideas for your own projects.
Warmly,
Pam


