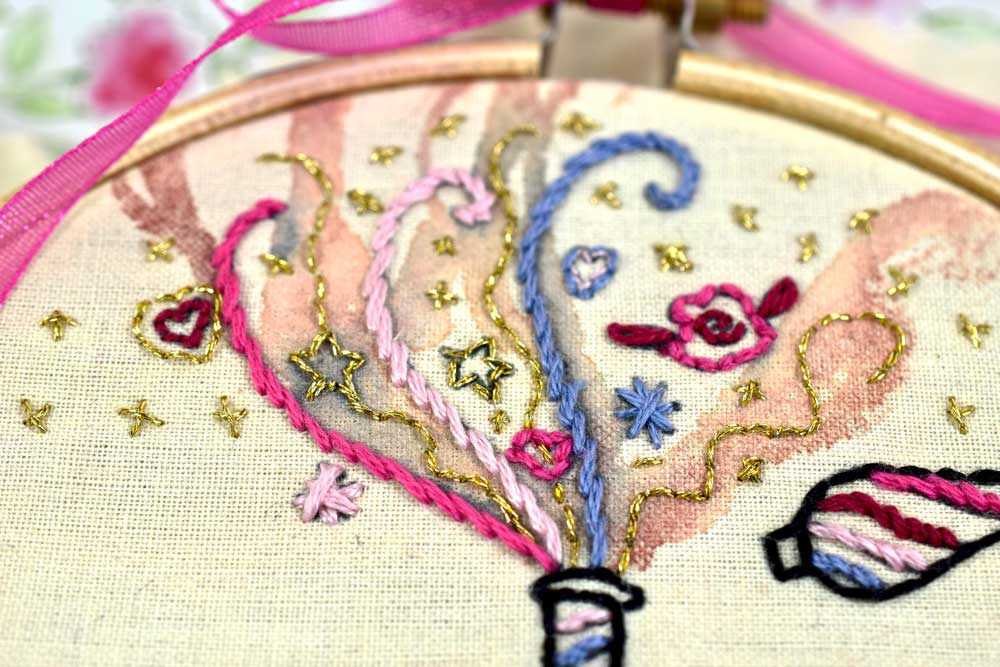
Today I have a new stitch to add to your repertoire of stitch knowledge. This one is called the stem stitch. As you can see in the picture above, this stitch does resemble the stem look for which it is named. This is a lovely stitch which can be used as a decorative border, a filler stitch (See the "S" above?), for text, and literally as an actual flower stem. It is not hard at all and is kind of similar to the SPLIT STITCH in technique.
Let's get started:
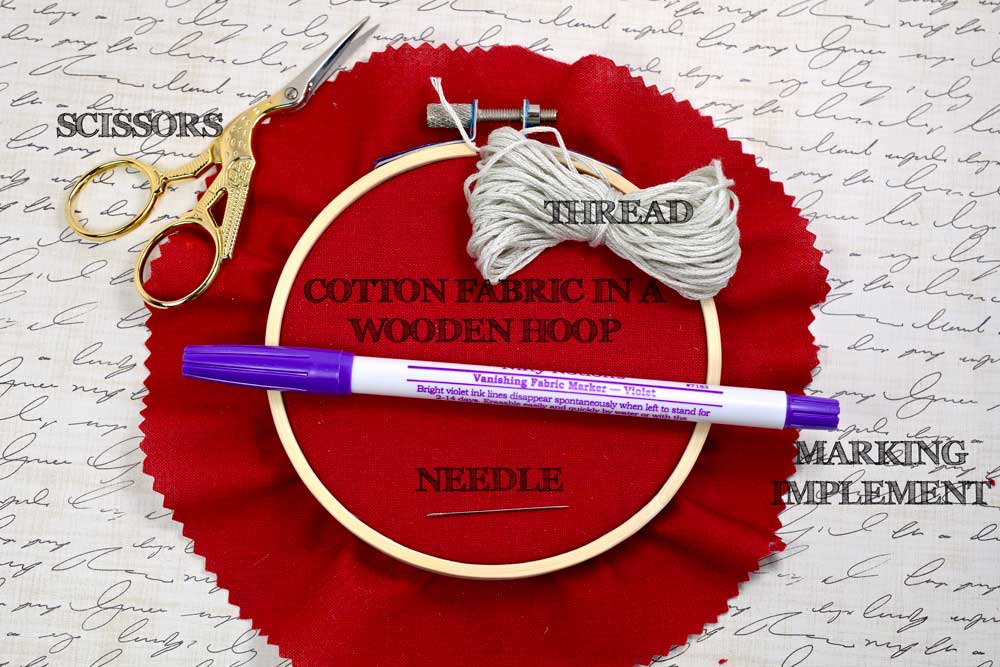
Gather your supplies:
1. FABRIC - cotton or linen fabric scrap
2. WOOD EMBROIDERY HOOP - Choose a size that the fabric can drape over about an inch and 1/2 or so. You want to fabric to fit nice and tightly into the hoop.
3. A MARKING IMPLEMENT: I have a fabric marker with vanishing ink. I like to use this for making guidelines when I am practicing. It can be found anywhere that sewing notions are sold. Just use a sharp lead pencil if that's what you have at home (I have even used ballpoint pens.) You want your line to be thin so that you can sew over it and it will be hidden under your stitches.
4. SCISSORS: It is really great to have a pair of sharp little scissors that are dedicated to embroidery only.
5. THREAD - My favorite thread to use is DMC six stranded thread.
6. NEEDLE - I used an embroidery needle that is size 8 or larger. Something to remember is the higher the size of needle, the smaller it is. Embroidery needles usually come in a pack with multiple sizes. Pick one that has a large eye that you can thread multiple strands into.
Using your marking utensil, draw a straight line across your fabric to use as a stitch guideline.
Cut a length of thread that is about 18 inches. Divide the thread into three strands by starting at the top and pulling slowly, letting the strands untwirl. If you go slowly you can avoid an annoying tangle or knot forming. Take one end of your thread and insert it into the eye of the needle then knot the other end. Bring you needle up at the beginning of the line you made, starting at the left.
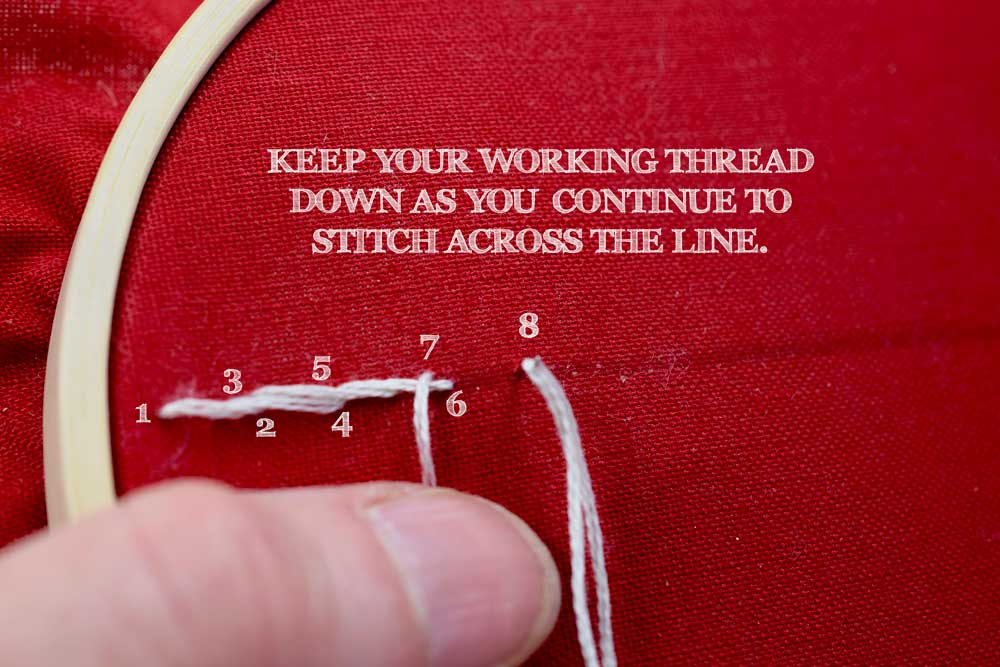
After pulling your needle up from "1", put it back down 1/4 inch from where you brought the needle up at "2".
Bring your needle up half way between "1' and "2" where I have marked "3" in the picture above.
Bring your needle back down at "4" which is an 1/8 of an inch from "2".
After bringing your needle down at "4" in the step above, bring your needle up just slightly above "2" where I have marked "5". This is very similar to the split stitch except instead of putting the needle in the middle of the thread, you put it slightly above the stitch at the end third of the stitch. This gives the line that 'stemmy', graduated look. Bring the needle back down at "6" about 1/8 inch from "4". You continue to repeat this stitch until you reach the end of the line.
Come up at "7" just above "6" and down at "8". Use your finger to hold the thread down as you work.
That's all there is to it, folks. I find the more you repeat the stitch, you muscle memory kicks in and it becomes so much easier. The stitches also become more neat and uniform.
Just an added tip, if you are working around a curved line, start to make your stitches smaller and closer together as you work your way into the curve. If you keep your stitches the same length they over reach the line and look sloppy.
Not only is Valentines Day coming but did you know February is NATIONAL EMBROIDERY MONTH?? As a special treat, I have created a free printable pattern for you. I designed this pattern so that you could both practice your split stitch and make a valentine keepsake at the same time.
Click HERE to get your free printable PDF embroidery pattern.
O.K., want to practice your new skill and sew along with me? Download and print your pattern. Get a light colored piece of fabric (cotton, unbleached muslin, linen....something slightly transparent.) This pattern is designed for a 4 inch hoop so 6 x 6 inches or enough fabric to hang over the edge of the 4 inch hoop by 1.5 to 2 inches so that the fabric lays nice and tight in the hoop. Tape the pattern to a bright window using a removable tape like washi or painter's tape. Next tape the fabric centered over the design. Use a sharp pencil or fabric marker to trace the design onto the fabric. Fit the fabric into your 4 inch embroidery hoop and let's get started! If you would like to see a picture tutorial on how to trace your pattern, click HERE.
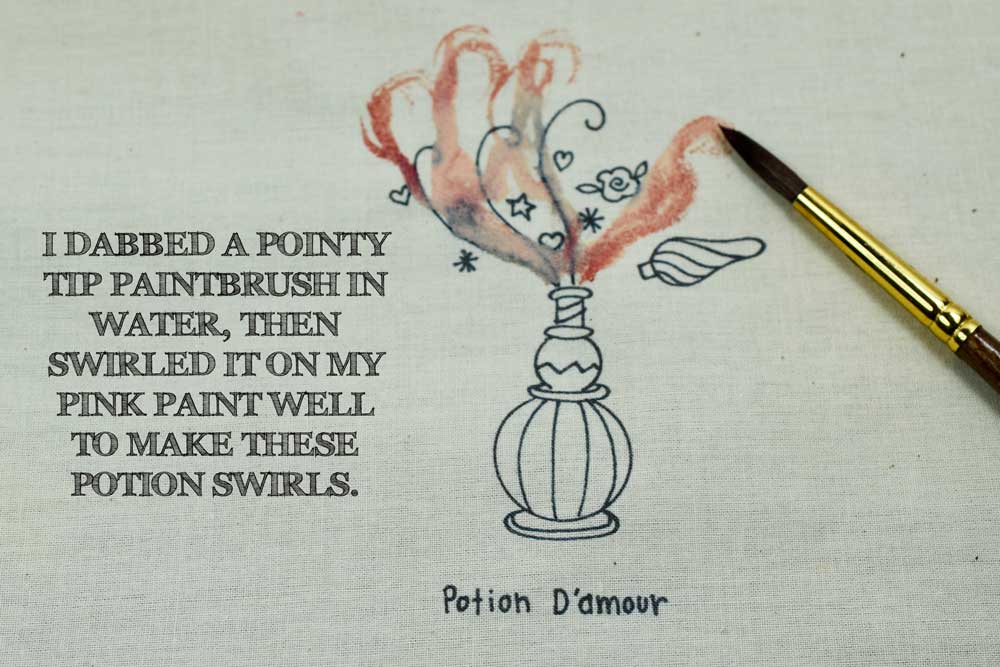
I decided to try something a little out of the box here and started by adding some watercolor paint to the top of the potion bottle. My imagining of a love potion was a pink smoky mist that smells like roses and is sparkly. The fabric I used was a cotton fabric meant for dying. I think if I were to do this again I might try to add the paint after I was done stitching. I printed my pattern onto the fabric using my home computer and the ink smudged a little. Always good to do a test swatch. If you are not feeling adventurous just skip this part:)
After adding my little paint swirls, I used a hairdryer to speed the drying process.
I start by outlining the bottle and the bottle top using the backstitch. I only used two threads. I did the lettering in backstitch using only one thread. This is just how I did it but feel free to flex those creative muscles and use however many threads you would like. Pick your own personal color palette. Have a ball! You can even opt not to trace the lettering onto your pattern or personalize it with your own lettering, such a date or name.
I used three threads to fill in the stripes on the bottle, the stripes on the bottle top, and the swirls coming out of the bottle in stem stitch.
150, 160,151, 8805, are the numbers of DMC thread colors I used.
I also filled in the stars, and hearts at the top of the bottle using two threads in backstitch. I used a DMC gold metallic on the spool for the stars. For the petals in the rose, I used the LAZY DAISY stitch.
There you have it!
Happy Valentine's Day and Happy National Embroidery Month!
Thank you warmly for stopping by!
Pam


