Happy New Year! Hope each and every one of you enjoyed a peaceful and loving holiday! As I step into this new year I always like to reflect on the year that just passed and think about what worked and what didn't. I love to dream about what I want for the new year ahead. Health goals, relationship goals and my favorite.....learning some new things.
If you are looking for a new and fun hobby to learn, you may want to consider embroidery! Unlike a lot of new hobbies, it is so inexpensive to get started, easy to learn, portable and so very relaxing!
I have tutorials here on the blog with many of the stitches to get you started. You will be surprised at how easy and fun this is!
Click on any of of the following to learn these basic stitches:
BACKSTITCH | FRENCH KNOT | RUNNING STITCH | SATIN STITCH | SEED STITCH
I have also provided a FREE PRINTABLE STITCH SAMPLER to get you started.
Wondering what supplies you may need? Click HERE for a list of supplies you will need to get started!
Today I want to introduce you to the SPLIT STITCH. This stitch is especially easy if you are already familiar with the backstitch but even if you are new to embroidery it is still pretty simple. Let me first show you how to make it, then I'll give you some ideas for its applications.
Start by gathering a few essential supplies:
1. A PIECE OF COTTON FABRIC - (unbleached muslin is great) framed in a wood hoop. The hoop size I use above is 5 inches.
2. SIX STRANDED EMBROIDERY THREAD - This is my personal favorite but it is fine to use perle as well (perle is one strand that does not untwist).
3. SCISSORS - Small and sharp for snipping thread.
4. EMBROIDERY NEEDLE - Choose a needle that has an eye that is large enough for multiple strands of thread. I buy needles labeled embroidery/crewel that come in packs with multiple sizes. An average size is 8 but experiment until your find an eye large enough that the thread can comfortably fit through.
5. MARKING PEN - This is optional if you want to create a guide for your stitching. You can use a sharpened lead pencil if you do not have a marking pen.
Use your marking implement to make a straight line to use as a guide for your stitches.
Thread your needle with an even amount of strands (2, 4 or all six). When making this stitch, as the name suggests, you will be splitting it in half so it is important that you have an even number of thread strands. Tie a knot at the end of the thread. Bring your needle up from the back of the hoop about 1/4 inch (the size of a piece of rice) from the beginning of the line you marked where I have labeled "1" in the photo above.
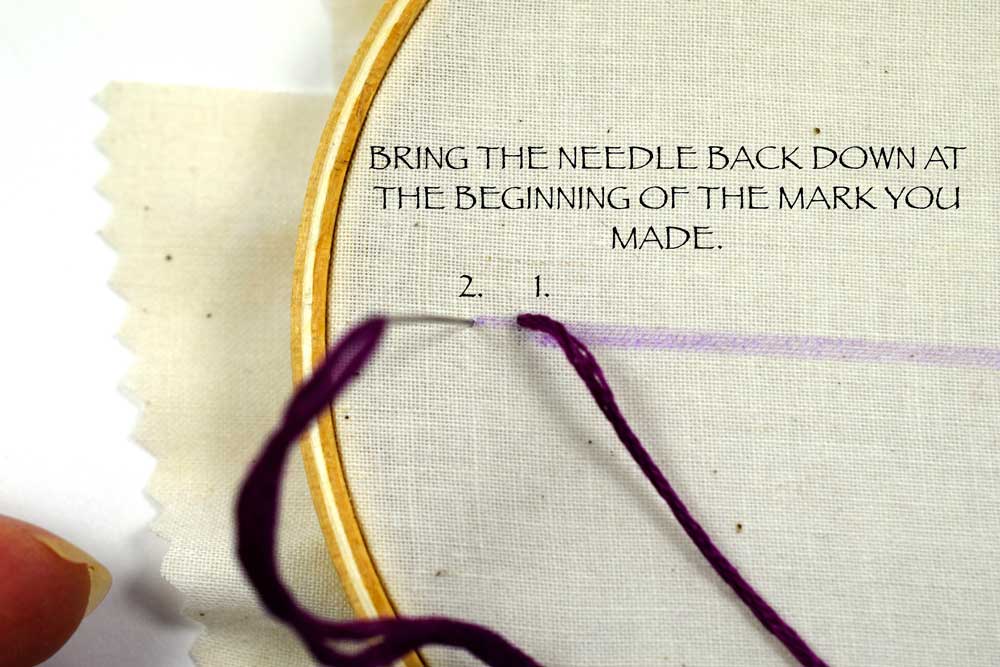
Next, bring your needle back down at the beginning of the line you made. It is labeled "2" in the photo above.
In this next step, bring your needle up from the back right in the middle of the stitch you just made where I have labeled "3" in the photo above.. If you used all six strands the needle should be directly in the center so there will be three strands on each side of the needle. If you are using one thicker strand just aim to get the needle in the middle of the thread strand.
Bring your needle back down into the fabric about 1/4 inch from the end of the last stitch where I have labeled "4" in the photo above. Then bring the needle back up in the middle of the stitch you just made and keep repeating.
That is all there is to it. It is a pretty, decorative stitch that has a braid-like appearance.
There are so many applications for this simple, yet charming stitch.
Split stitch is excellent to use when you want to emphasize an area by outlining it. In the above example the split stitch was used to outline this penny. Some gold metallic backstitch was added for a little extra shimmer. If you would like to practice, this penny is available as a mini pendant kit in my shop LOVESTITCHERY.
Here is a close up so you can see the detail of the split stitch.
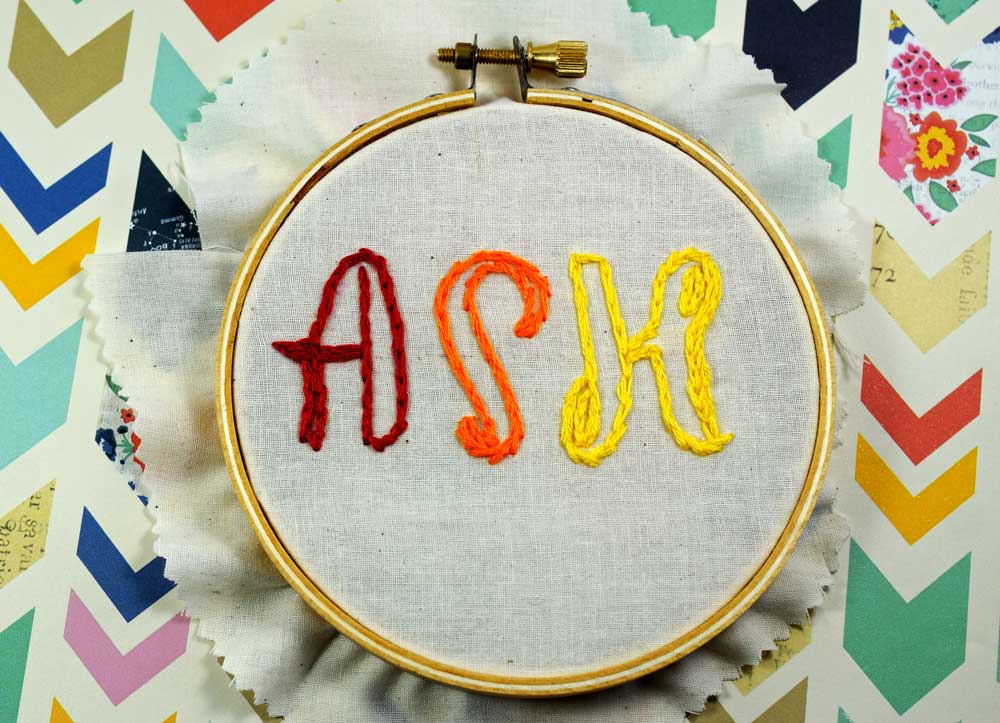
Split stitch is an excellent decorative stitch for text and lettering. It works well for both outlining the letters and filling them in.
The heart in the above picture was filled in using all split stitch, just to give you an idea what the stitch looks like when using it to fill a space.
If you would like to learn more you might be interested in these:
WORKING WITH METALLICS | EMBROIDERING WITH BEADS | COUCHING TECHNIQUE
Thank you so very much for stopping by! I wish you a new year filled with dreams-come-true!
Lots of love,
Pam


