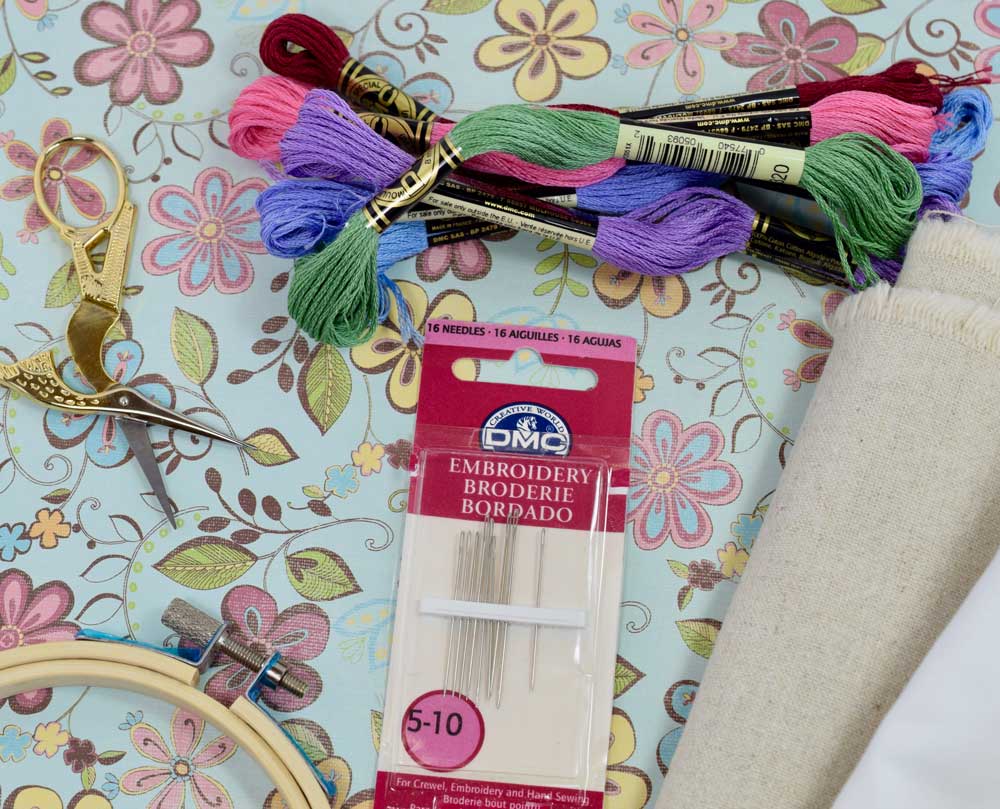
Are you just getting started learning embroidery? Maybe you just saw some awe-inspiring embroidery pictures on pinterest and thought "Wow, I want to learn how to do that!" Well this just might be the post for you. Today I want to go over the essential embroidery starter kit.
I have some great news for you. Unlike many new hobbies out there, this is a very affordable one! Start up costs are very minimal. It is so very portable and way cheaper than therapy! The following recommendations are for free style embroidery. There would be different recommendations for other types of embroidery such as counted cross stitch or needlepoint for example.
1. NEEDLES: Let's start by talking about needles. Needles are arguably one of the most important tools when it comes to hand embroidery. Picking out the wrong needle for the job can lead to some very unpleasant frustration. Needles differ in several ways. They have different levels of sharpness, thickness, and different sized eyes (the opening at the top). For beginning surface embroidery, you want to choose needles that are labelled EMBROIDERY/CREWEL needles. The features that make a needle an embroidery needle is that they have a sharp tip, great for piercing fabric and they have a nice sized eye which enables them to hold multiple strands of threads. Needles come in different sizes. The larger the size, the thinner the the needle. One way to tell if you are using a needle that is too thick for the fabric you are using is if it leaves a hole in the fabric. I will talk about fabrics a little later but as far as needles go, I like to start with a size 8 or above. You will notice that if you go to a craft or fabric shop that most needles are sold in multi-packs. Since each needle is not individually labelled you are not exactly sure what size you are using! I recommend buying a multipack and choosing one. Try a few practice stitches. How does it feel moving in and out of the fabric? It should be smooth and glide easily. Can the eye hold three or more threads? If not, you may want to pick a needle with a larger eye. Does is leave a large hole in the fabric or is it seamless? If you have met these criteria, you have found the right needle for the job!
Above is a pack I recommend. Size 5-10 offer a great variety for beginners. Remember, the larger the size the thinner the needle. After a little practice you get a feel for what you do and do not like. Do yourself a favor and find a needle that feels good at the start. This just makes the whole overall experience nicer!
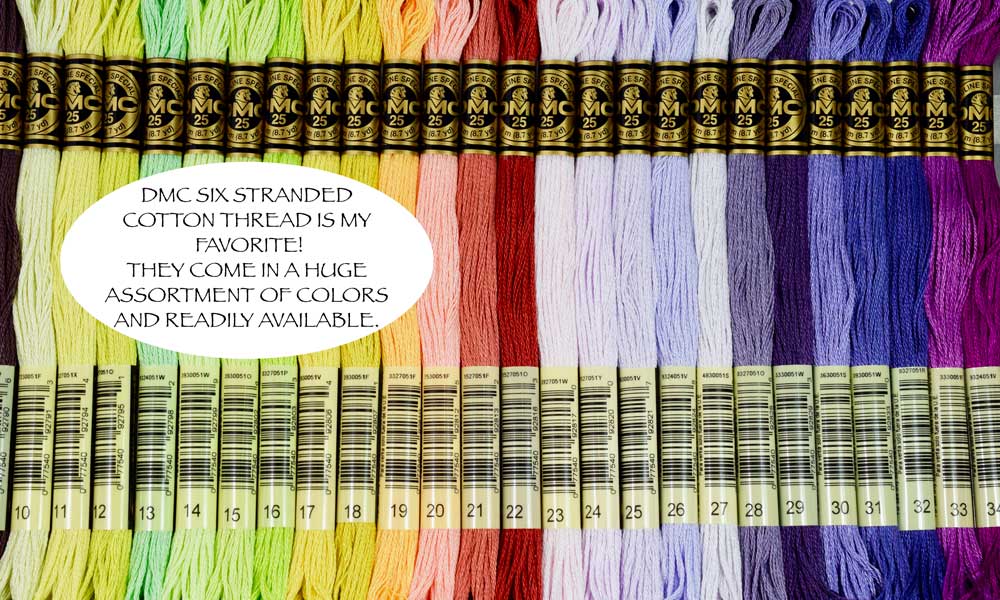
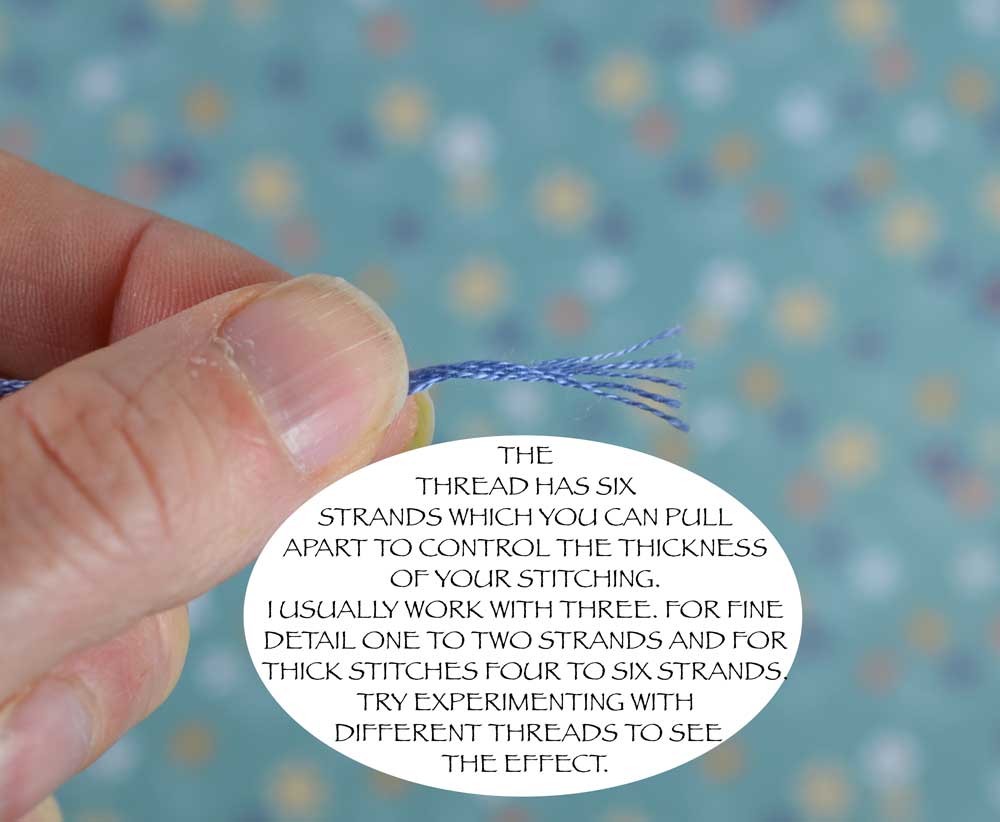
2. THREAD: There are so many different varieties of threads you can use. There are silk, metallic, florescent, glow-in-the-dark, and cotton threads in every color you can imagine! My favorite kind to use, especially for beginners, is DMC six-stranded cotton thread. I love this thread for three reasons. One, it is available everywhere in every color you can imagine. Two, it is a nice quality. It is mercerized which means it had been treated to make it smooth and shiny which makes it glide through the fabric smoothly. The third reason I love this thread is that it has six strands. It can be divided and separated so that you can control the thickness of your design. There are certainly a lot of other brands you can buy but I am recommending my favorite since I have had such good experiences with it. I started out with a basic pack of multiple colors and slowly added colors as I needed them.
Above is an example of a great starter pack of popular colors. If you are not sure you want to invest that much at the beginning, you can just buy a few skeins individually at your local craft store. Each skein is about 50-60 cents! You can just buy black, white, and the primary colors (ROY G BIV - red, orange, yellow, green, blue, indigo, and violet). BOOM. Five or six dollars for a rainbow of colors!
3. SCISSORS: It is really important to have a good dedicated pair of scissors that you only use for cutting threads. Nothing is more annoying then hacking away at thread with a dull pair of scissors! Below are my very favorite pair of scissors! They are still as sharp as the day I bought them and they are the classic pair of scissors that comes to mind when you think of hand sewing aren't they?
4. FABRIC: When you search for fabric you are looking for a plain, even weave. "What is a weave?" you may ask. Weaving is the way in which a fabric has been produced using two sets of threads combined at right angles to form the cloth. A plain, even weave is when the horizontal and vertical threads form a simple criss cross pattern and the threads are an even size. Thread count can also be considered. When you are buying sheets for your bed, you look for a high thread count (more threads which are more tightly woven) but when you are doing surface embroidery using light cotton threads with a low thread count and looser weave are much easier to get your needle through! Fabric choices can seem vast and overwhelming so I am going to keep it very simple by recommending just a few.
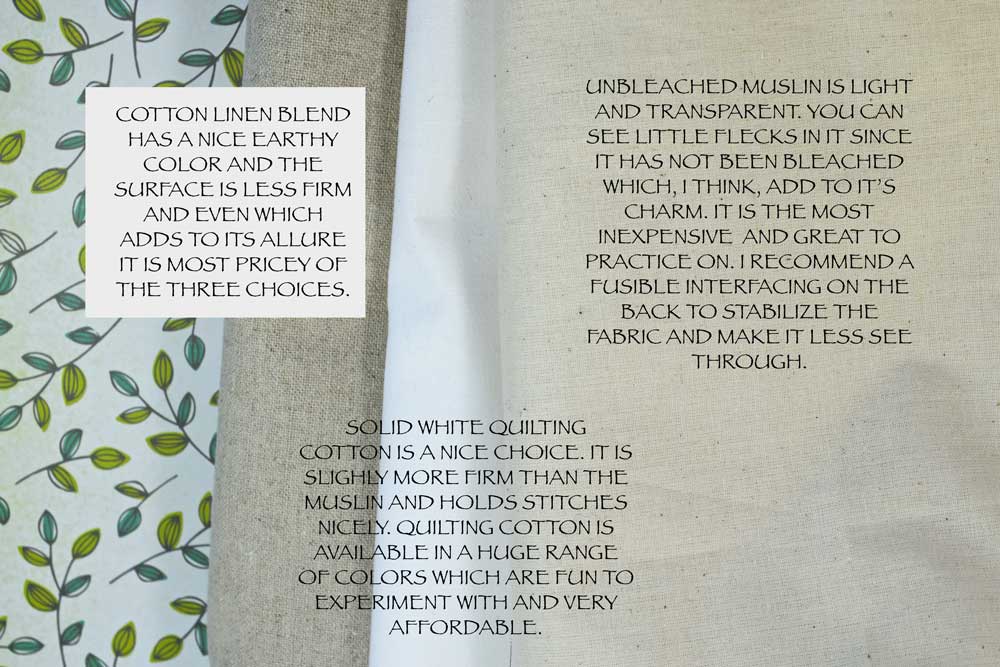
a. COTTON: The cheapest and easiest choice is what we call here in the U.S. UNBLEACHED MUSLIN. It is a simple plain woven cotton. It is thin and light so it's transparency makes it really easy to transfer a pattern using a bright window. I think in other countries this is called Calico. (This is not to be confused with Cheesecloth, a gauzy fabric used for straining when cooking!). This fabric is very inexpensive and attainable. Here is a sample of what unbleached muslin is.
One yard goes a long way for small projects! It comes in call kinds of width sizes. Since muslin is so thin and transparent, I like to add fusible interfacing.
This serves two purposes. 1. It stabilizes the fabric which makes it easier to sew on and 2. It makes the fabric less transparent so that you can not see the stitches in the back when viewing the piece from the front. It is really easy to just iron a small piece onto the back of the fabric before getting started and totally worth the extra effort.
b. SOLID QUILTING FABRIC (KONA): This is a solid colored cotton fabric that comes in every shade of color you can imagine. It is inexpensive and can be found in many local craft stores and all fabric stores. If you are going to choose a darker color, keep in mind you will need a different way of transferring your pattern, other than tracing since the darker fabric is not transparent. You can use TRACING PAPER or WATER SOLUBLE STABILIZER which is easy to do. It is so pretty to see the contrast of light thread on dark fabric, so worth a try.
*With cotton fabrics, it is a great idea to wash and dry them before getting started. If you wash it after embroidering it, it can shrink and ruin the look of your stitches. Better to pre-wash if possible. If it is not an item that will ever get wet, you can skip this step:)
Above is an example of some solid colored quilting fabric. Many times if you are purchasing fabric online you will see fabric sold by the "fat quarter". This is a standard size reference that refers to a yard of fabric that has been cut length wise and width wise making it 18 x 22 inches approximately which is a great size for both quilting and embroidering.
Below is an example of fabric you can buy by the yard if you prefer. When you buy a yard you are getting 3 feet length wise and the width size varies (36", 45", 54", 60", 72", and 118). One yard is a nice amount to start with.
c. LINEN is another good choice. Linen is a fabric that is made from the flax plant. Just an interesting little fact. The fiber threads tend to vary in size so the surface can be more uneven. There are specialty treated pre-cut linen fabrics that are available in the embroidery area of fabric and craft stores which are smoother but tend to be a lot more pricey.
Above is an example of linen fabric. Isn't it charming?
Below see an example of pre-cut linen which has been smoothed out especially for needle work.
Here are the fabrics all together so you can make a comparison.
A closer look at all three together to show you the textures close-up.
d. READY MADE ITEMS: These include, most commonly, flour sack towels that you find at the craft store or other 'ready to be embroidered' items. I have seen pillowcases, bookmarks, and bibs to name a few. If you are not yet feeling up to navigating the fabric choices this is an excellent way to go. I started by buying a pack of dish towels and haven't looked back since! Even if you don't embroider them, you can be sure they will be put to good use!
Below is a pack of flour sack towels.
e. YOUR OWN WARDROBE - I have derived lots of pleasure and experience from experimenting on old clothing and up-cycling it to turn it into something fun and unique! You will certainly learn a lot about what it's like to embroider on denim, knit fabrics, and more!
There are seriously infinite choices of fabric! When I started it all seemed way too overwhelming. Have you ever stepped into a fabric store ?......It's just mind bending if you are not sure what you are looking for. I hope I have simplified that for you a little. As you embroider more, you will discover your own personal favorites along the way.
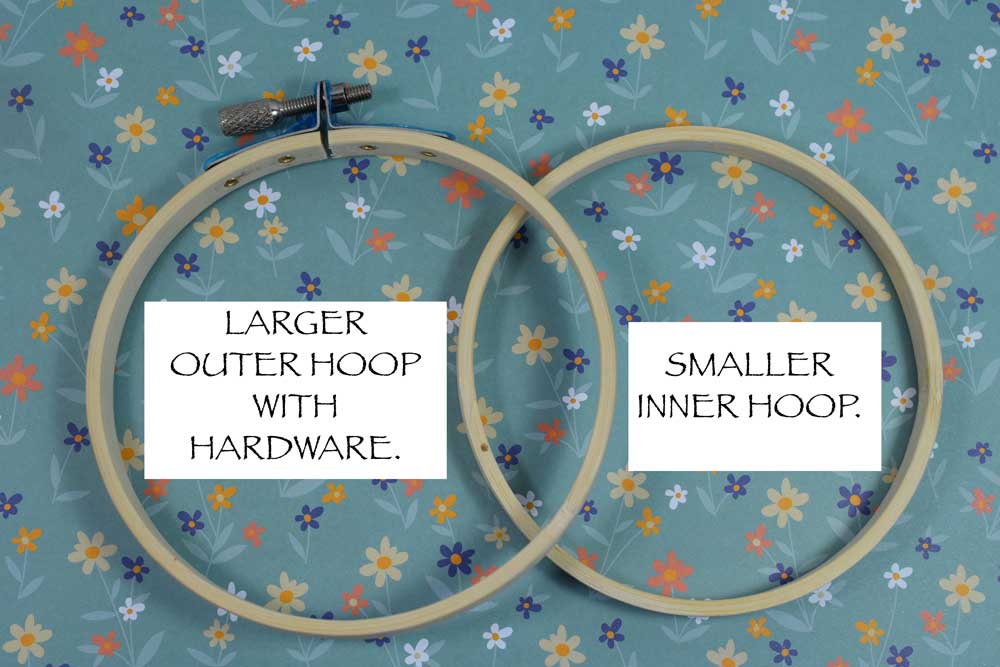
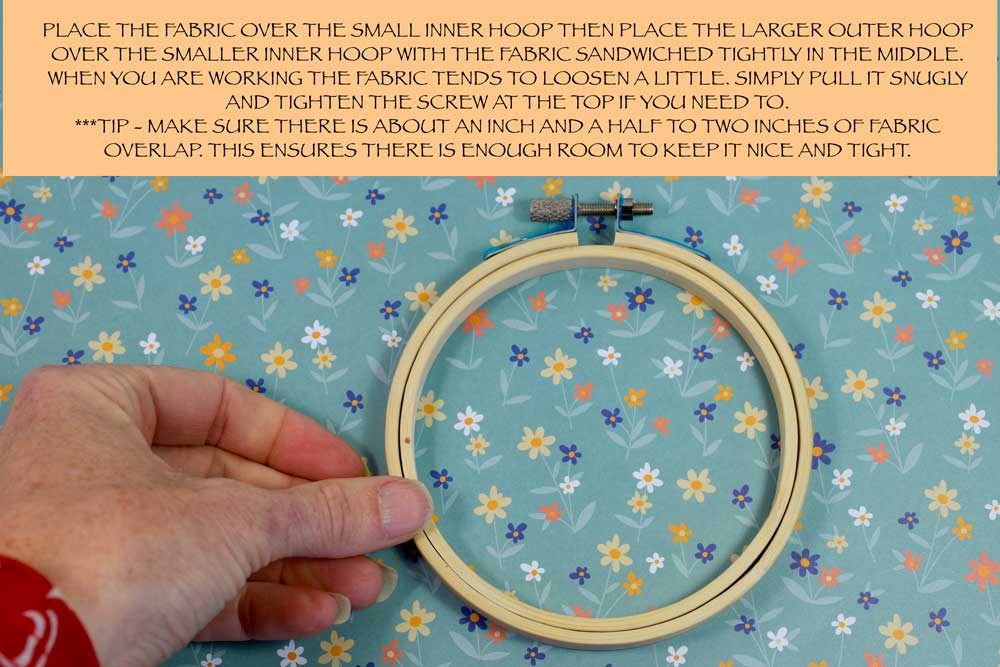
6. WOODEN EMBROIDERY HOOP: While these are not mandatory, I highly recommend starting with a hoop. A hoop contains an inner smaller ring and an outer larger ring with some type of hardware at the top to tighten the hoop. The fabric gets sandwiched between the two hoops and is nice and tight for sewing.
Not all hoops are created equally. There is a difference in price and quality. If you get the very cheapest hoop, you will notice the wood is rather rough and sometimes has splinters. This is not the end of the world but it can snag your fabric. You can sand it a little before beginning. I started out using these and did just fine. Another thing to look for is the quality of the hardware at the top. A nice strong well made screw is great since you will be constantly adjusting and tightening your fabric. As you start investing your time in bigger more complex projects, and finer fabrics you may want to consider better quality hoops. There are also plastic hoops available which are also nice and smooth and easy to work with. It's really a matter of personal preference.
Below is a nice little starter set of hoops.
O.K, this is the most basic starter kit! As you can imagine, there are lots of optional, helpful accessories but I really wanted to keep to the very most basic of beginner supplies to get you started!
*This post contains affiliate links.
I have lots of free printable patterns available here on the blog for practice as well as free tutorials on how to do the most basic stitches which I will review in next week's post.
Thank you kindly for stopping by!
Pam

