Chalkboard art had been very popular in recent years. Once you take notice, you start to really see examples of it all over the place; notecards, restaurant menus, grocery store flyers, and just about everywhere you look! Go ahead and search “chalkboard art” and see how many images pop up. This is what inspired me to try to make my own version of chalkboard art. Chalkboard embroidery!
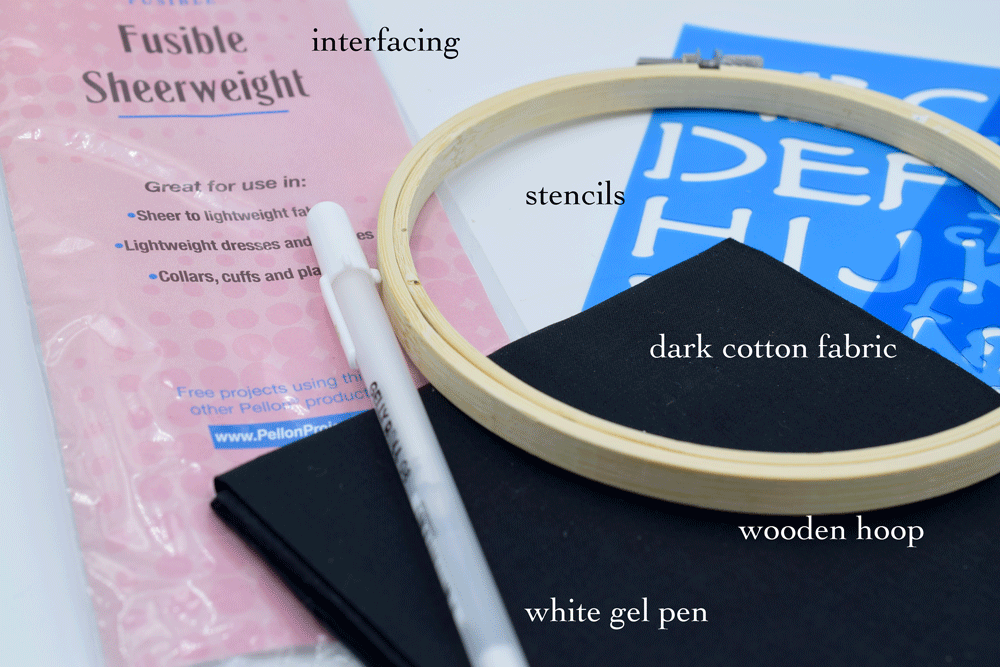
If you want to follow along, gather a couple of things.
COTTON SCRAP FABRIC: Dark chalkboard-like fabric such as navy, black, or some dark fabric.
WHITE GEL PEN: This is used to sketch on the fabric as a stitch guide and also to add a chalkboard-like effect at the end.
WOOD EMBROIDERY HOOP: Get a hoop to place your fabric into to keep it stretched tight so that it is easier to sew on.
LIGHTWEIGHT INTERFACING: This is fused on the back of the fabric before stitching to make the fabric less transparent and to add stability.
STENCILS- These are optional. You could just use your own handwriting which has it’s own great charm.
EMBROIDERY NEEDLE: I like to use a size 8 or above.
SIX STRANDED COTTON EMBROIDERY THREAD: Use a white or pastel color to mimic chalk
SCISSORS: For cutting thread.
Pick a dark fabric that is chalkboard-like.
I love these pens for sketching on dark fabrics.
I always add interfacing to the back of my cotton fabrics. It makes the fabric less transparent so you can’t see the stitching in the back from the front side. I also like that it makes the fabric a little more stable but still thin enough to sew through comfortably.
My sister gave me this spatula. I loved it so I decided I would make a baking inspired embroidery. For inspiration I looked up chalkboard art on pinterest and google. Banners, twigs with leaves, and little flourishes were very popular so I used then in my design theme. I used stencils to create the “bake” lettering then improvised the rest with my own handwriting. I really think your own handwriting is very appealing so have fun with it. You could sketch it out on paper first or just wing it. It doesn’t have to be perfect. Perfection is over-rated:) Tell yourself that and allow yourself to just go for it!
Once you are happy with your sketch, use your beginner stitch knowledge to sew over your sketch.
In the above example, I used SATIN STITCH for the “bake” lettering, BACKSTITCH for the banner and “happy” lettering, and some LAZY DAISY for the petals. Simple. You don’t have to completely cover the white pen. It adds a more chalk-like effect to leave a little showing.
I added a few FRENCH KNOTS around the perimeter for a little extra detail. I had the strong urge to keep adding more but applied my 80% rule. For all you over-doers out there this is a fabulous mantra. Stop when you are about 80% finished. This usually keeps me from overdoing my work to the point where there is no return.
I added some white scribbling to imitate the smudge of a real chalkboard surface. I achieved this effect by scribbling vertically first then horizontally over the vertical marks with the white gel pen.
That’s all there is to it. I think it really resembles a chalkboard, doesn’t it?
Hope you give it a try and are pleased with the results.
*This post may contain some affiliate links.
Thanks for stopping by!
Pam


