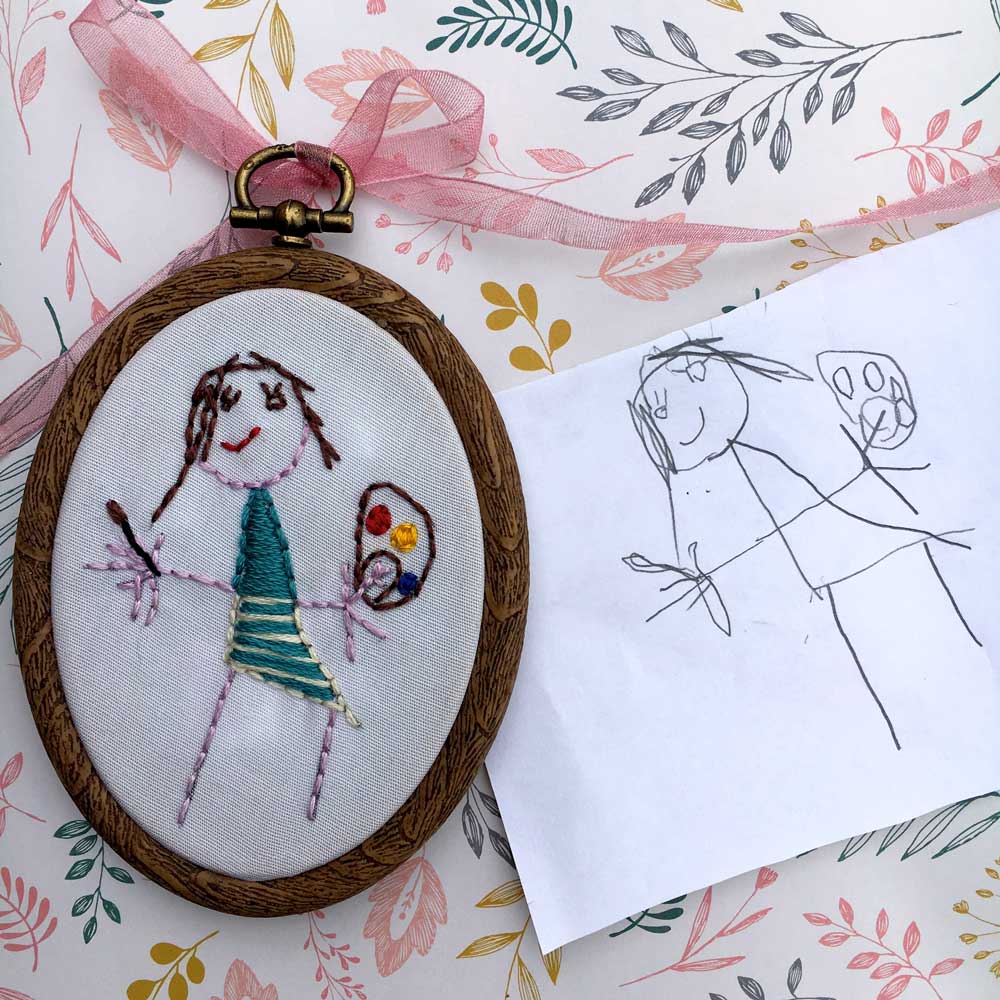
I love children's artwork. There is such an authenticity and fearlessness in it that touches my heart. Over the years my kids have made some amazing things. I have such a hard time parting with anything they have made but it can really pile up and eventually there has to be decisions about what stays and what goes. I have seen many ideas about things you can make with kid's artwork and how to store it but when I saw this masterpiece my son made I knew exactly what I wanted to do. O.K., I know to anyone else this probably looks like your typical kid scribble, but to me....perfection because it is me through my child's eyes.
It is a portrait of me. I have a paint palette in one hand and my paint brush in another. A happy lopsided smile. I well up just looking at it, so perfect it its simplicity. I decided I'd like to embroider it and have it as a keepsake. This would be such an amazing gift idea, especially for Mother's Day! What cold be more touching than seeing yourself through the eyes of a child? It really only took a couple of hours. So here's what I did:
Here are some of the supplies you will need. As you can see, simple and inexpensive.
Start with a simple drawing. (You can ask your child to make you a simple drawing or use one you have already). My son presented this to me and it happened to be the perfect size for an embroidery hoop I already had. I would suggest that you go the the craft store, pick out the hoop size you wish to use, and then trace around the inside of it. Tell your child to draw the picture inside the circle you traced. This way you can be sure it will fit. If there is already a drawing you want to use, take it with you to the store so you can get the right sized hoop. One more option: if you have a scanner and photoshop, you could change the image size to whatever you like.
I chose a simple white cotton fabric. You could even use muslin. If you have old sheets or pillowcases, by all means, use those! You just want a nice, light colored cotton fabric.
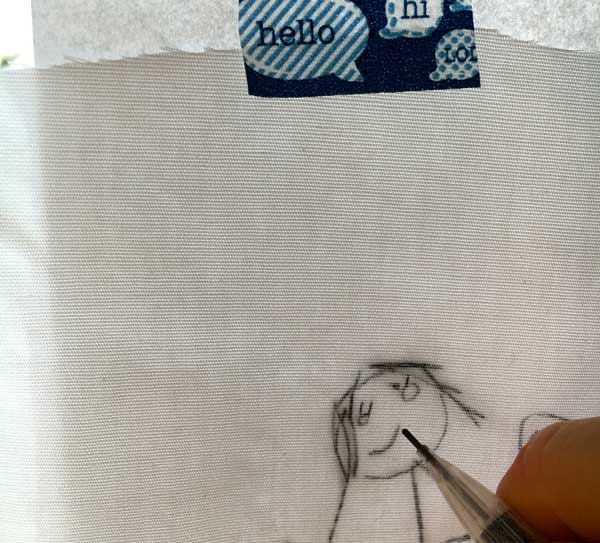
Here is why you want a nice light fabric. You will tape the piece of art onto a bright window. Next, tape your light colored fabric over the top. Voila! Now you can transfer the image onto the fabric by tracing it. (When cutting your fabric piece, make sure it will cover the whole picture and also that there will be 2 inches extra hanging out of the hoop. The reason for this is so that you can finish the back when you are all done so the picture lays flat. Also, so that the fabric is nice and taught in the hoop when you are sewing). There are special fabric pens and markers you can use with ink that disappears but I just used my trusty mechanical pencil. It worked just perfectly.
I use my nice sharp mechanical pencil to carefully go over all the lines with as much detail as possible.
Here is what it looks like after I finished tracing, side by side with the actual drawing.
Once you are happy with your drawing, now you can fit it inside the hoop. Your hoop comes in two pieces. A bigger one and a smaller one that fits inside. Center the picture under the bigger hoop.
Now turn it over and fit the small ring inside the larger one with the fabric sandwiched in the middle.
Here it is, nice and taught. You can see there is a couple of inches of fabric hanging out of the hoop, as I mentioned above. Now comes the fun part! Pick out your colors. You may decide to keep it monochromatic which would look adorable but I just had to add some color. Brown for my hair.
Embroidery comes in six strands. I like to separate mine into strands of three.
Put one end of the thread through the needle and and knot the other end.
Put your needle through the back and in through the hoop letting the knot catch in the back.
Pull the needle though to the side with the picture. These stitches you see above are called backstitches. You can do the whole picture with a simple backstitch or if you know your way around a needle you can get all fancy-pants. To do the backstitch, you pull the needle up through the fabric a little before the first stitch and then put the needle back down next to the first stitch, See below:
Pull the needle through the back and repeat until you finish or run out of thread. Leave enough at the end to make a knot in the back to hold on the work you just did.
To make your knot in the back, simply run your needle under a couple of secure stitches you already made. This will create a loop which you will pull your needle through to make a knot. I like to do it twice for added security. I didn't leave very much thread at the end of this one, as you can see, so it was hard to make those knots. You will get a feel for this as you keep doing it.
Once you are satisfied with your work of art, you need to finish off the back. While it would be great to just hack off the remainder with a pair of scissors, it would stick out and look sloppy. Here is what I did:
turn your hoop over and gather up all that extra fabric. Now thread a needle with some light colored thread and knot the end.
Now pick up various little pieces of fabric and run your needle through. Do this around the whole circle.
Once you get to the end, gently pull on the thread and you will see that the fabric cinches nicely. Now, with the fabric cinched, make a knot to secure it.
At this point you an cut off any excess fabric.
Now it will lay flat. If you still think this looks a little sloppy, you could cut a piece of felt to size and glue it over the top to give it a neater more finished look.
There you have it! A super sweet and touching gift capturing a sweet moment in time.
Hope you have some fun creating your masterpieces!
Warmly,
Pam


